?unique=82b4e5c)
If you want to design stunning social media posts, blog graphics, posters, or YouTube thumbnails without hiring a designer, Canva is the perfect tool for you. This guide will walk you step‑by‑step through Canva, from creating your first design to downloading it—no design experience needed.
What Is Canva and Why Use It?
Canva is an online graphic design tool that lets you create professional designs using simple drag‑and‑drop controls. You can start from thousands of ready‑made templates and customize everything—text, colors, fonts, images, and more.
Why creators love Canva:
No design skills required; everything is visual and intuitive.
Free plan is powerful enough for bloggers, students, coaches, and small businesses.
Huge library of templates, photos, icons, videos, and elements to speed up your work.
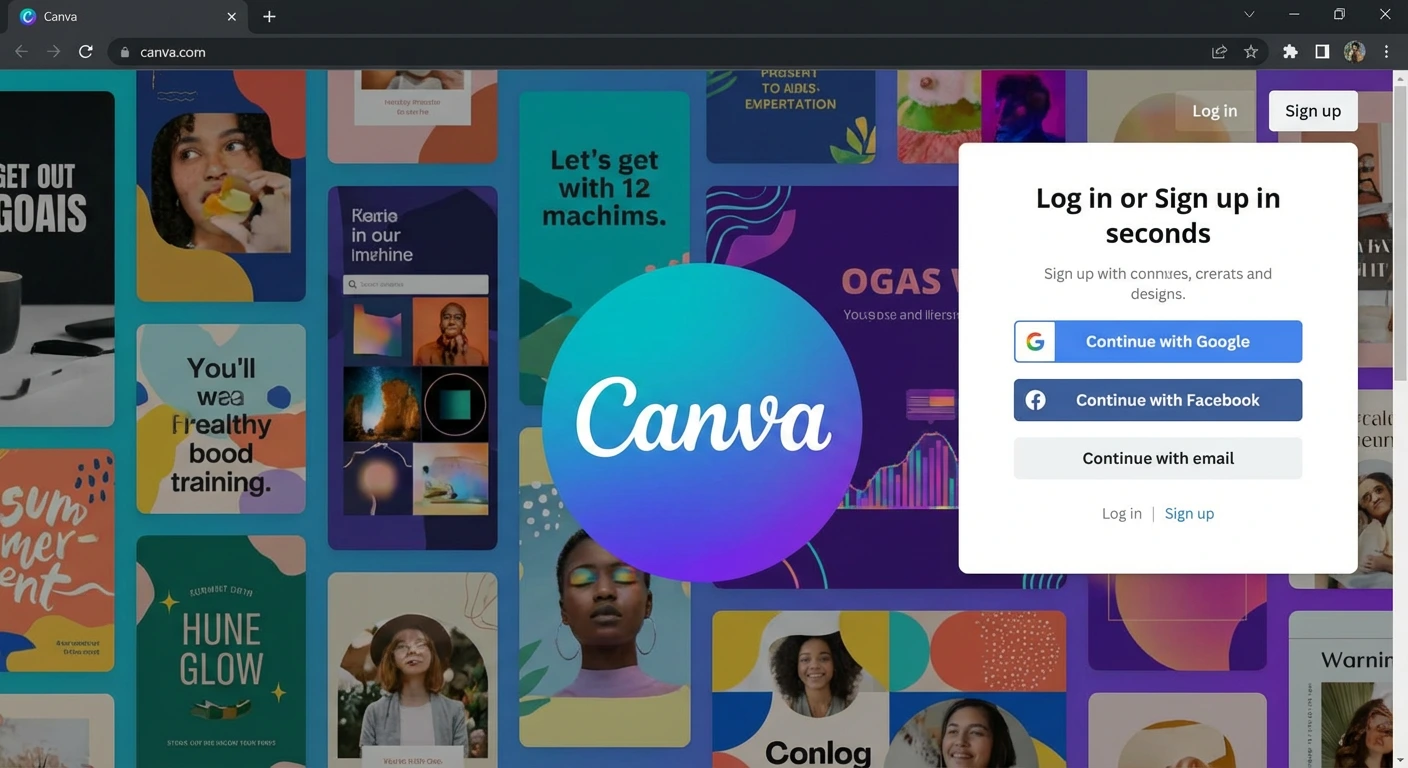
Step 1: Create Your Canva Account
Go to canva.com and click Sign up.
You can sign up using Google, Facebook, or email.
Choose your role (personal, student, teacher, small business, etc.) to get tailored suggestions.
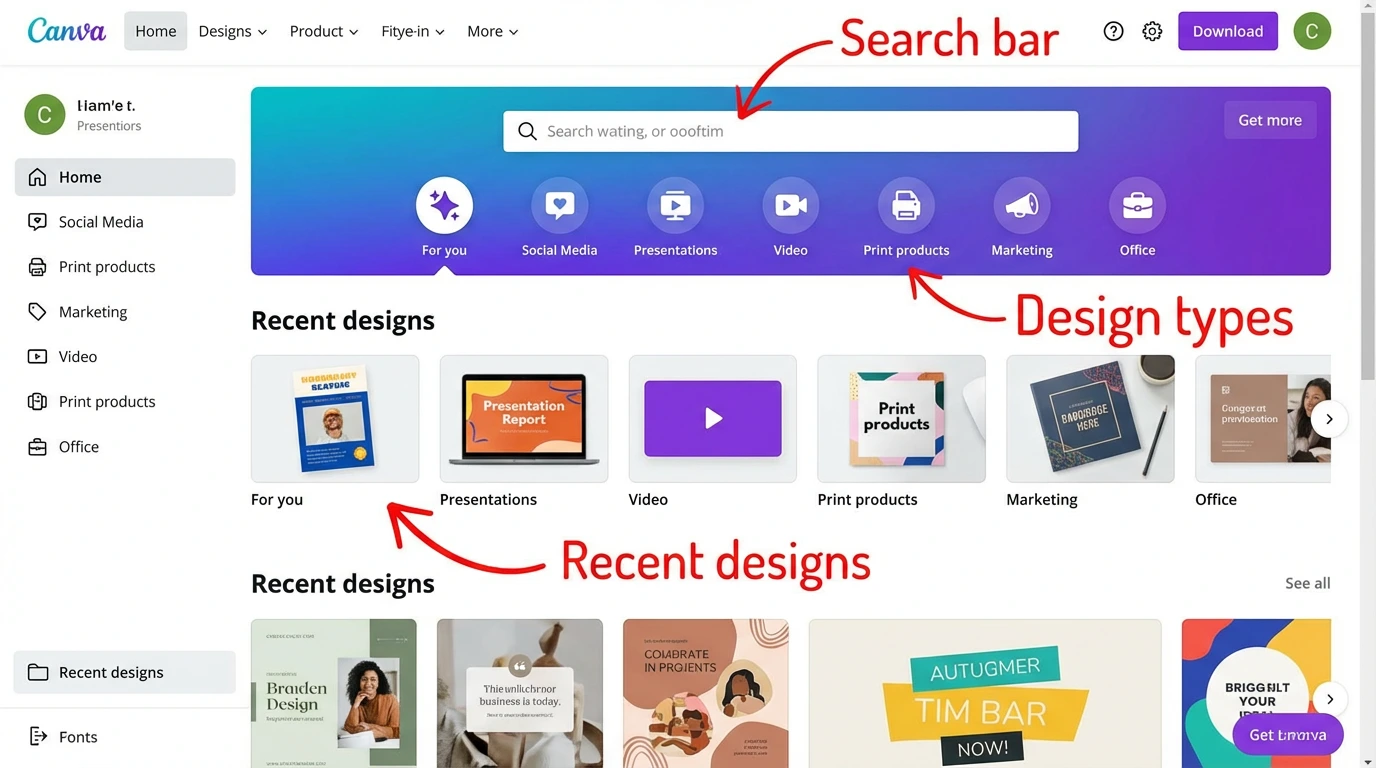
Step 2: Explore the Canva Dashboard
Once you log in, you’ll see the main dashboard. Here’s what you’ll typically find:
A search bar at the top to find any template (Instagram post, YouTube thumbnail, poster, resume, etc.).
Pre‑sized design options like Instagram Post, Presentation, YouTube Thumbnail, Poster, Logo, and more.
Recommended templates and your recent designs.
Image idea for this section:
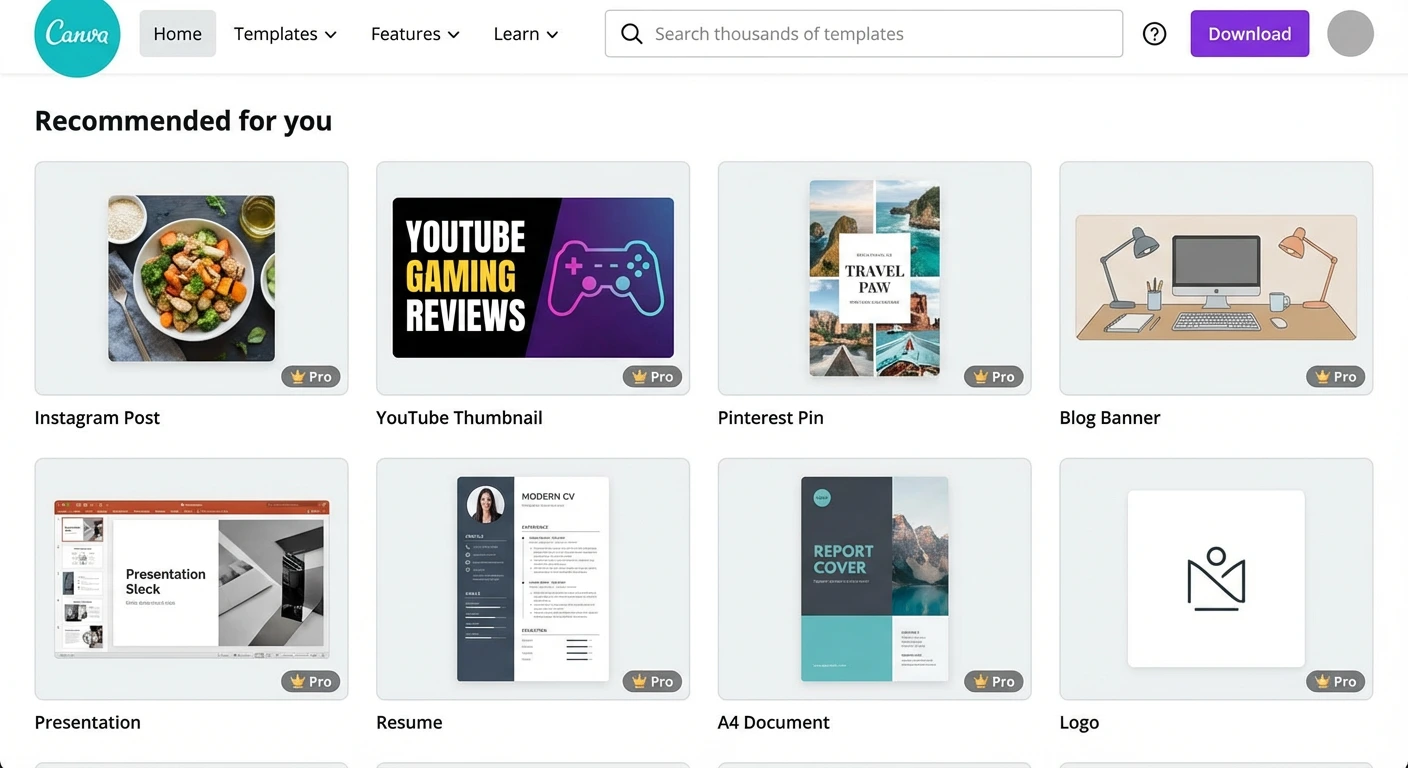
Step 3: Choose the Right Template
You can start from a blank canvas, but templates make designing much faster and easier.
Popular Canva template types for beginners
Instagram Posts & Stories: Perfect for quotes, promotions, and personal branding.
Pinterest Pins: Great for bloggers to drive traffic from Pinterest.
YouTube Thumbnails: Eye‑catching thumbnails that increase video clicks.
Blog Banners & Featured Images: Clean designs for your WordPress or blogging site.
Posters & Flyers: For events, workshops, webinars, and local promotions.
To use a template:
Type what you need in the search bar (e.g., “Instagram quote,” “blog banner,” “Pinterest pin”).
Browse the templates and click on one that matches your style.
Click Customize this template to open it in the Canva editor.
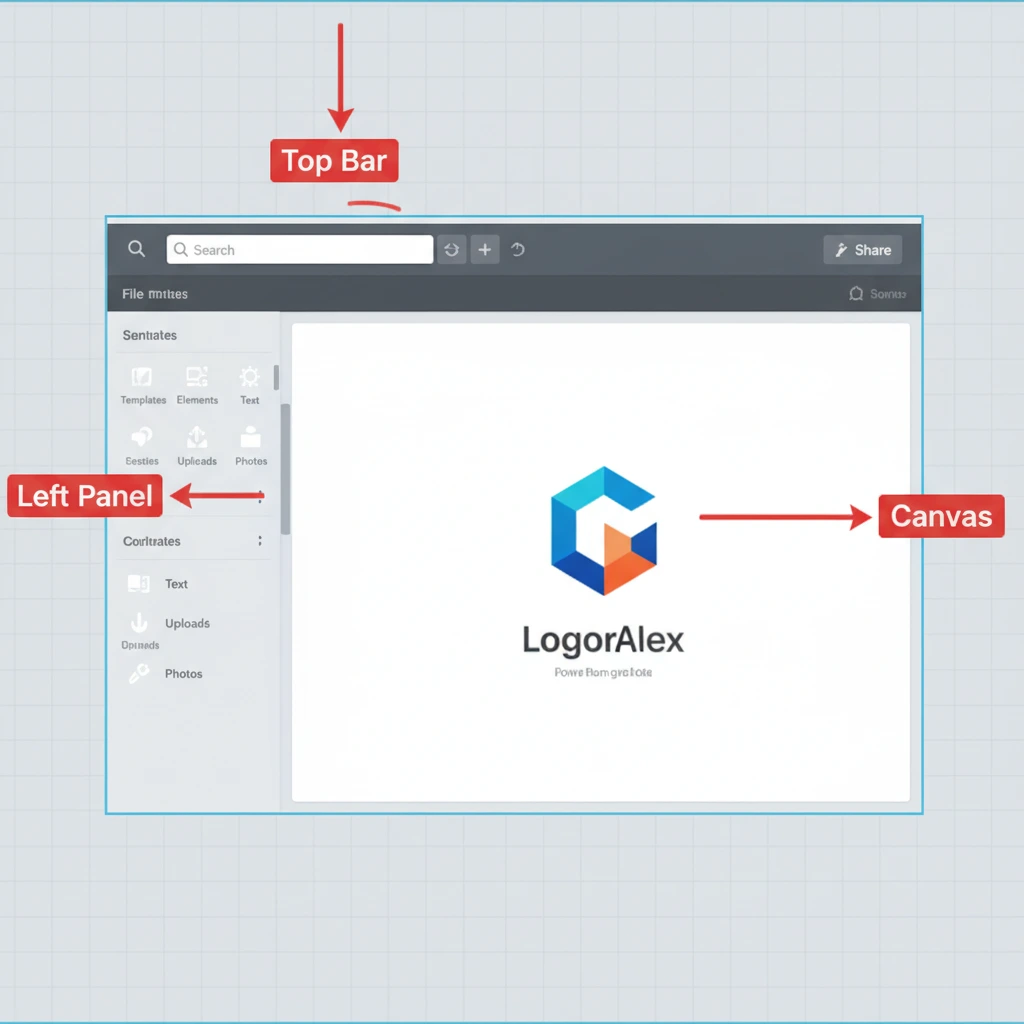
Step 4: Understand the Canva Editor
When your template opens, you’ll see the main editor screen:
Left side panel: Elements, text, photos, uploads, templates, and folders.
Top bar: Undo/redo, font selection, font size, color, alignment, effects, animations, and download options.
Middle area: Your actual design canvas.
Key panels you’ll use most:
Templates: Switch to a different layout without starting over.
Elements: Shapes, icons, lines, stickers, charts, and more.
Text: Ready‑made text combinations and all your font settings.
Uploads: Add your own images, logos, and videos.
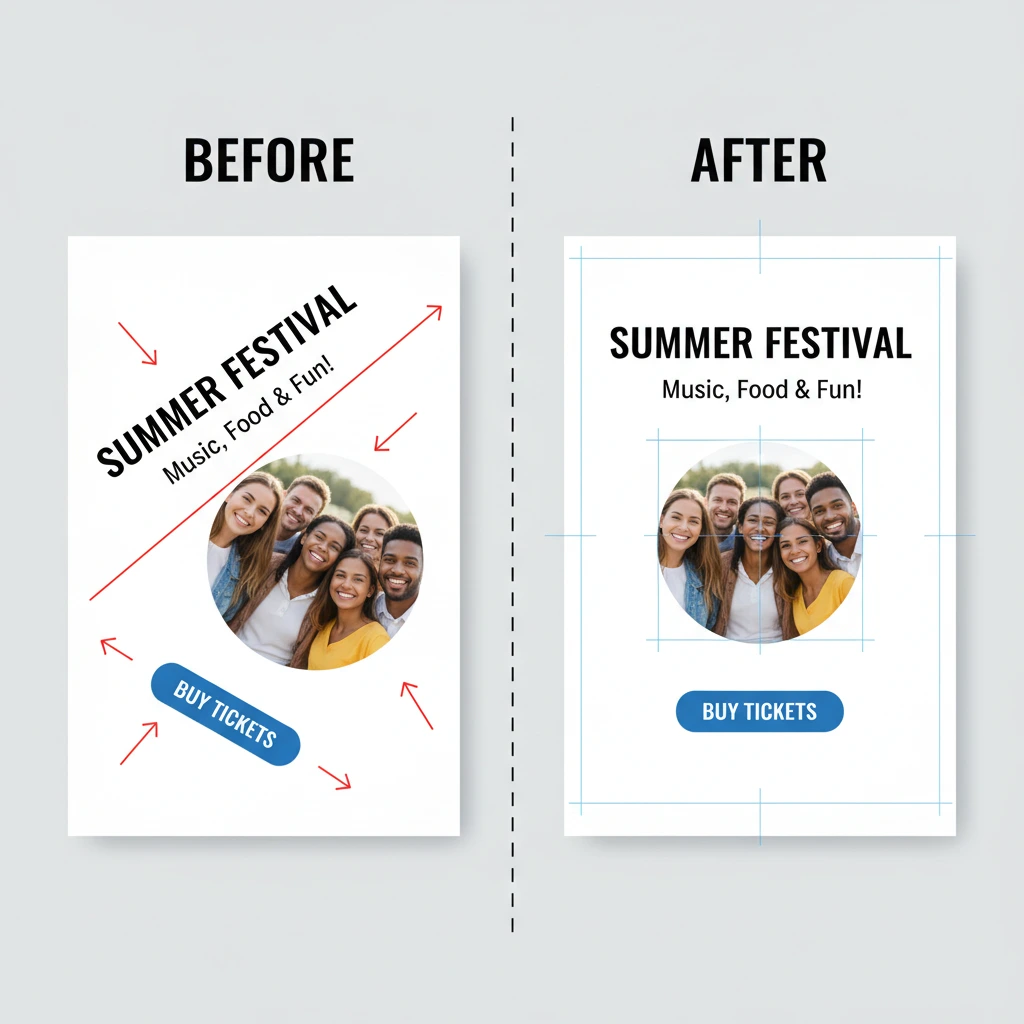
Step 5: Customize Text (Fonts, Colors, Sizes)
Your text is what communicates your message clearly, so it should be readable and on‑brand.
How to edit text
Click on any text box in the template.
Type your own headline, subheading, or body text.
Use the top bar to change:
Font (e.g., modern, elegant, bold)
Font size
Text color
Alignment (left, center, right)
Effects like shadow, outline, lift, glow
Simple font tips for beginners
Use 1–2 fonts per design (one for headings, one for body text).
Make headlines large and bold so they stand out.
Use high contrast (dark text on a light background or vice versa) for readability.
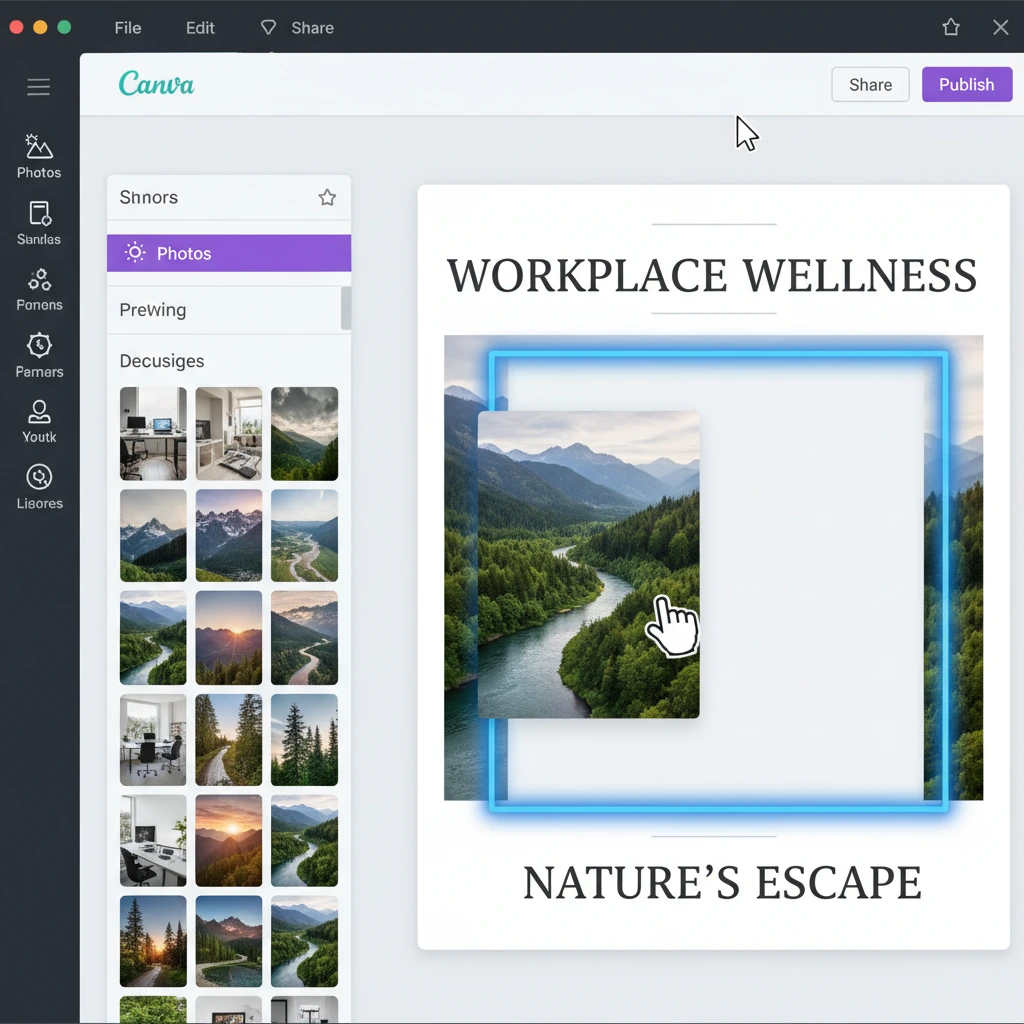
Step 6: Add and Replace Images
Great visuals can dramatically improve your design. Canva gives you two options: upload your own images or use stock photos from the built‑in library.
Option 1: Upload your own images
Go to Uploads in the left panel.
Click Upload files and select images from your device.
Drag and drop your uploaded image onto the canvas or into an existing photo frame.
Option 2: Use Canva’s free images
Click Photos in the left panel.
Search for a keyword related to your topic (e.g., “laptop,” “fitness,” “nature,” “office”).
Drag your chosen photo into the design or into a frame to auto‑replace the old photo.
Step 7: Work With Elements (Icons, Shapes, and Graphics)
Elements add style and structure to your designs. You can use them to highlight text, create sections, or illustrate ideas.
Useful element types:
Shapes: Rectangles, circles, lines, and abstract shapes to create backgrounds or highlights.
Icons & Illustrations: Represent ideas (e.g., a calendar for dates, a phone for contact info).
Stickers: Animated elements for fun social media posts.
Lines & Arrows: Direct attention to important parts of your design.
How to use elements:
Click Elements in the left panel.
Search for what you need (e.g., “arrow,” “star,” “abstract shape,” “business icon”).
Click or drag the element onto your canvas.
Resize, rotate, and recolor it using the top bar.
Step 8: Apply Brand Colors and Fonts (Optional but Powerful)
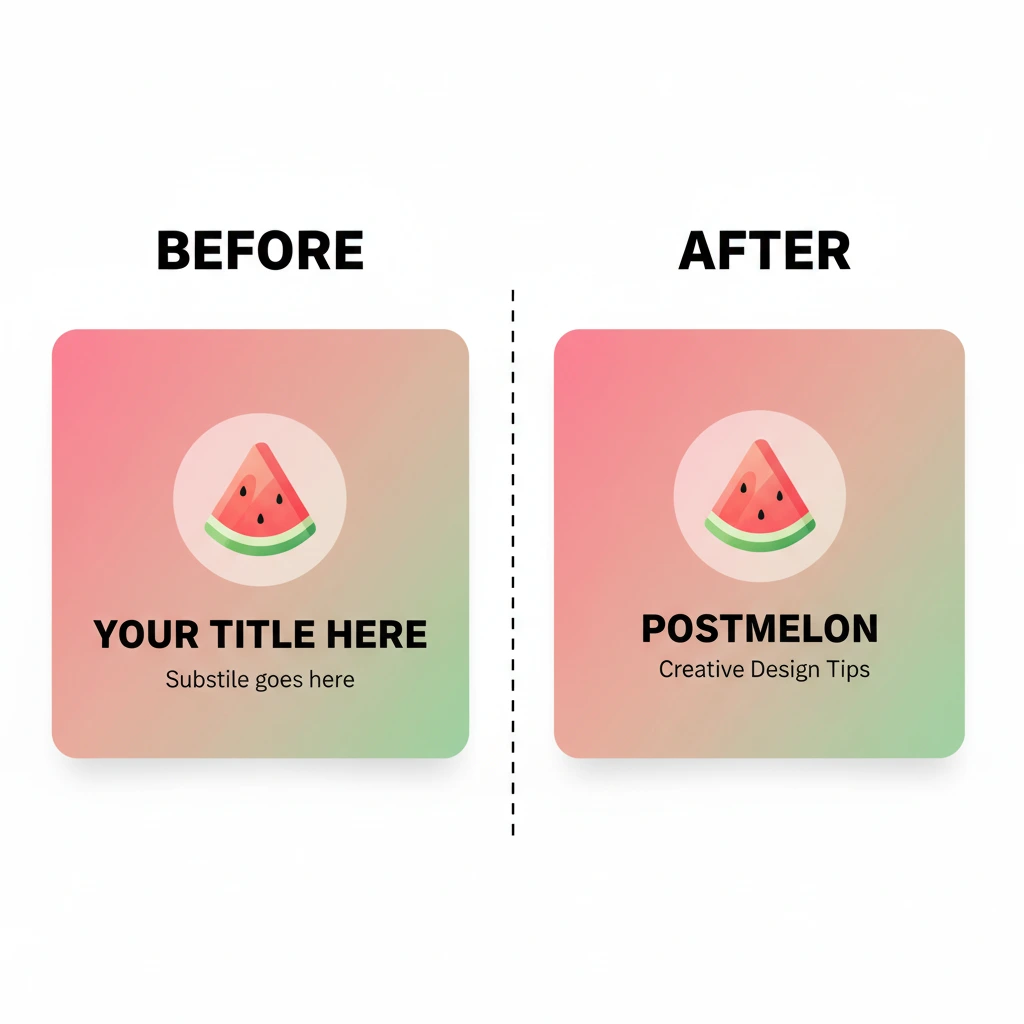
If you are building a brand for your blog “Postmelon,” using consistent colors and fonts across all designs makes you look professional.
Quick way to stay consistent
Choose 2–3 brand colors (primary, secondary, accent).
Pick 1–2 go‑to fonts for headings and body text.
Reuse the same combo on every Instagram post, blog graphic, or YouTube thumbnail.
In Canva Pro there is a built‑in Brand Kit feature, but even on the free plan you can save consistency by:
Copying previous designs and editing the content.
Creating one “master template” for your posts and reusing it.
Step 9: Use Simple Canva Effects and Tricks
Here are a few easy Canva tricks that make your designs look more professional:
Duplicate designs or elements: Select an element and press Ctrl/Cmd + D.
Align everything perfectly: Use Canva’s smart guides or “Position” button to center items.
Group items together: Select multiple elements and click Group so you can move them as one.
Transparency: Use transparency to soften background shapes behind text.
Background remover (Pro): Instantly remove the background from product photos or portraits.
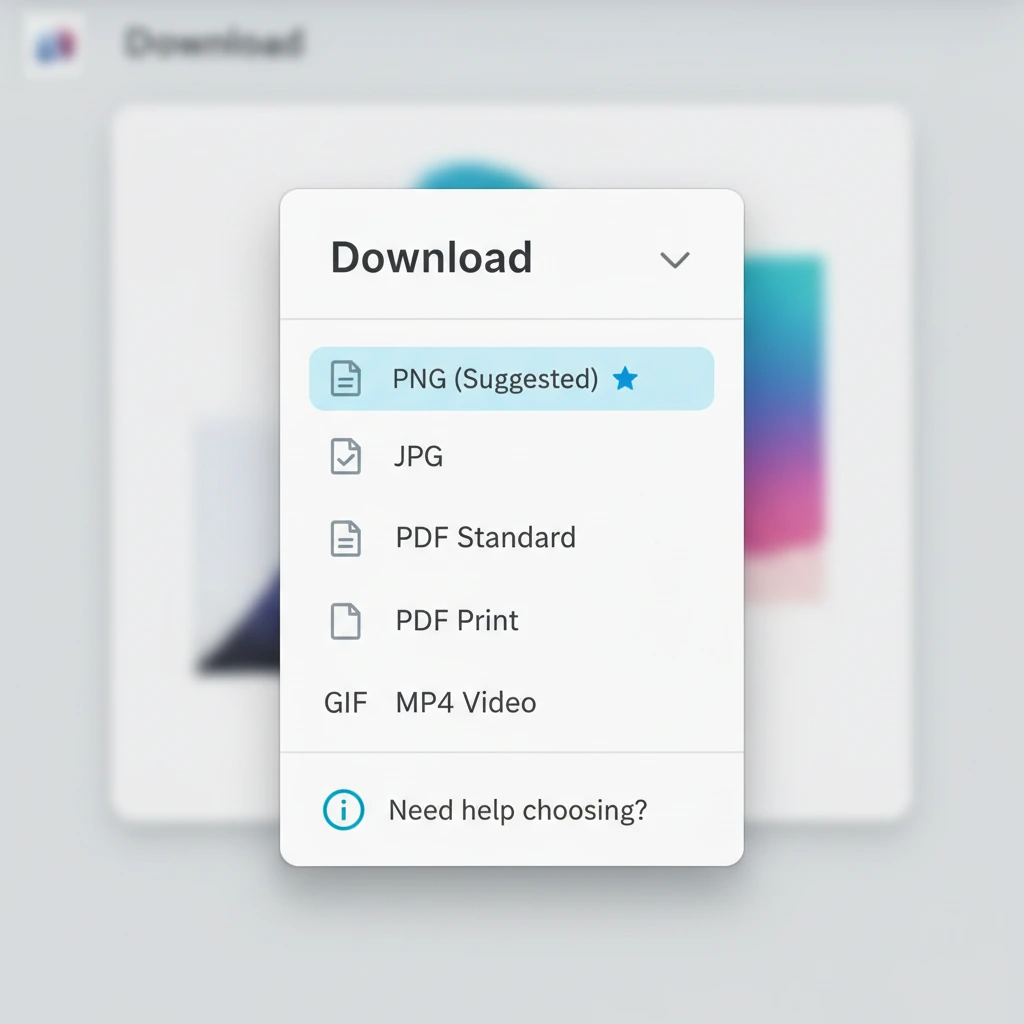
Step 10: Download and Share Your Design
Once you’re happy with your design, it’s time to export it.
Click the Share or Download button in the top‑right corner.
Choose a file format:
PNG: Best for high‑quality images and transparent backgrounds.
JPG: Smaller file size, good for web use.
PDF: Perfect for documents, eBooks, printables.
MP4 or GIF: For animations and short videos.
Click Download and save it to your device.
You can also publish directly to social platforms (like Instagram or Facebook) if your accounts are connected, but most bloggers prefer to download and then upload manually into their CMS (like WordPress).
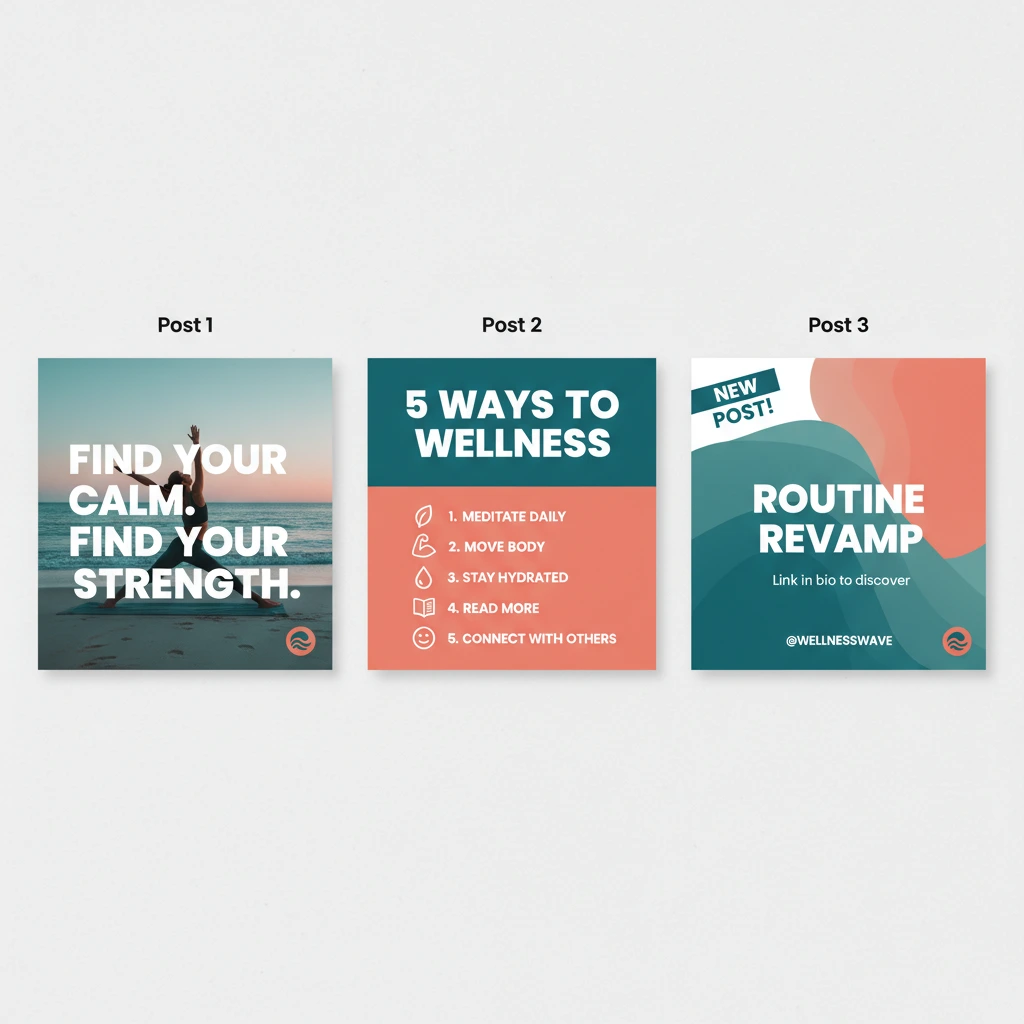
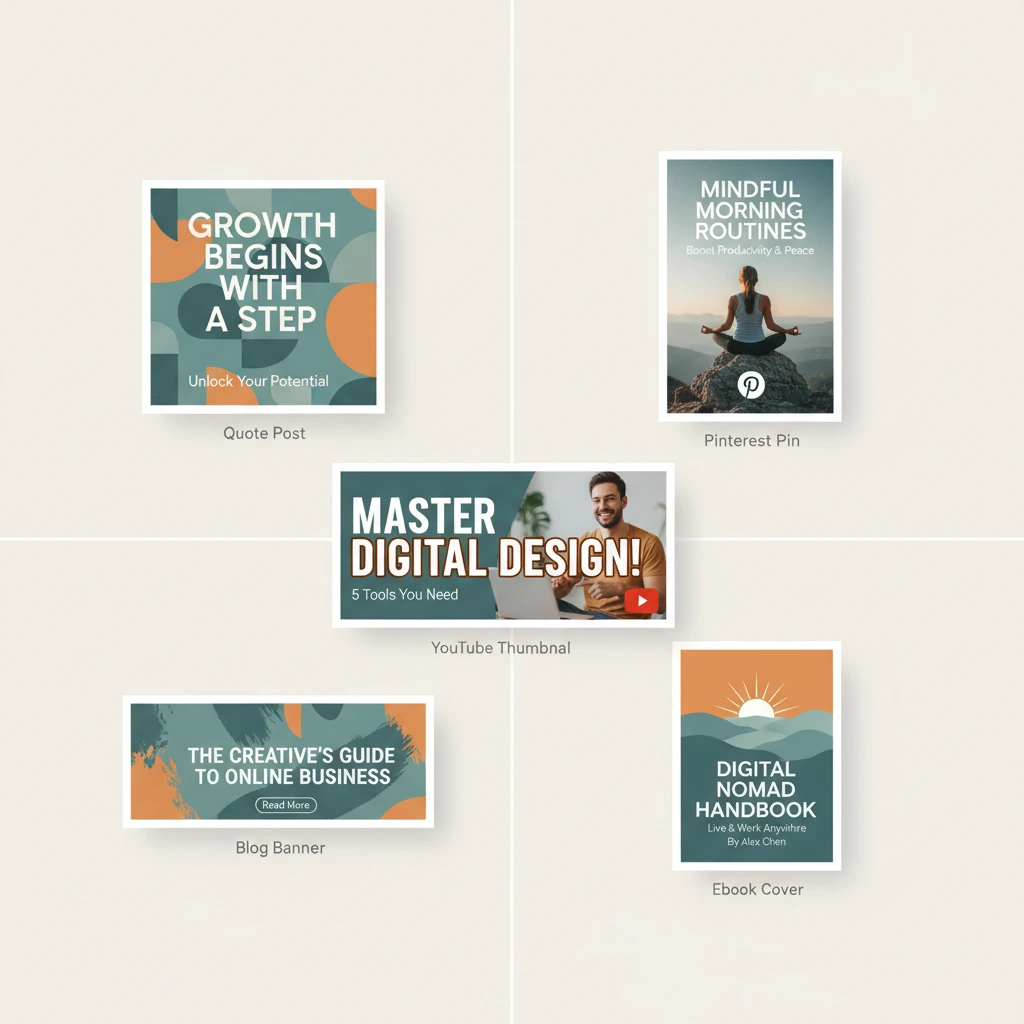
5 Canva Design Ideas You Can Create Today
To help your readers and audience, you can suggest a few quick projects they can start with right away:
Instagram Quote Post – Use a square template, add a short quote, and apply your brand colors.
Pinterest Pin for Your Blog – Use a tall template, add your blog title, a catchy subtitle, and a call‑to‑action.
YouTube Thumbnail – Choose a bold font, add your face or a relevant image, and use 3–5 words only.
Blog Featured Image for Postmelon – Use a clean blog banner template, include the post title and your logo.
Simple Lead Magnet Cover (eBook/Checklist) – Use a document or ebook cover template and customize it with your brand.
Final Thoughts
Canva makes graphic design accessible to everyone, whether you are a beginner blogger or a growing brand like Postmelon. The more you experiment with templates, fonts, colors, and elements, the more natural it will feel. Bookmark this guide, pick one design type, and create your first Canva design today—your visuals will instantly look more polished and professional.